
REVIEW · SALEM DAY TRIPS & TOURS
Witch City Broom Making Workshop in Salem
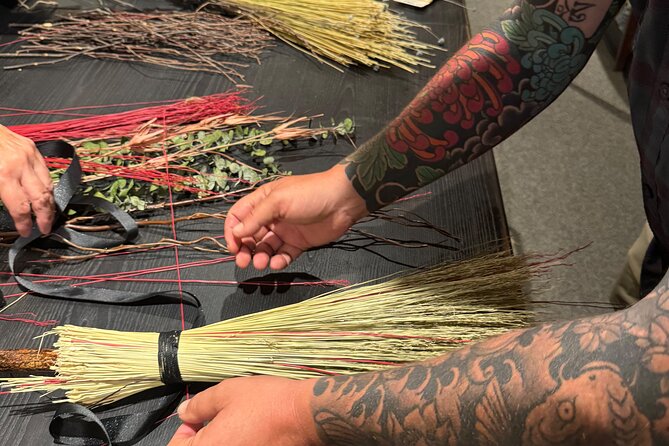
Salem magic turns practical fast: you make your own witch broom. You’ll pick the base, add ribbons and charms, and learn the wrapping method so your souvenir looks finished, not accidental. The best part is the personal feel: this is a small-group workshop with hand-on crafting and real creative choices.
I especially like that you choose your own broom handle and broomcorn before you decorate. You’re not stuck with one pre-made look, so your broom feels like it belongs to you. And the instructors tend to keep things calm and un-rushed, which matters when you’re trying to wrap and attach tiny details.
One thing to keep in mind: the class is listed at about 1 hour 30 minutes, but plan extra time. Some schedules can stretch closer to two-plus hours once everything is wrapped and ready to carry.
In This Review
- Key Highlights You’ll Actually Notice
- Where to Meet in Salem (and How Not to Go to Essex Street)
- What the Workshop Feels Like in Real Time (90 Minutes Means Plan Ahead)
- Step One: Picking Your Broom Handle and Broomcorn
- Step Two: Designing with Charms, Ribbons, and Earthy Accessories
- Step Three: Wrapping the Broom and Adding the Finishing Details
- Carrying It Home: Wrapped, Ready to Display
- Price and Value: Is $134.70 for a Broom Workshop Fair?
- Who This Workshop Fits Best (and Who Might Want Another Plan)
- Should You Book This Salem Broom-Making Workshop?
- FAQ
- How long is the Witch City Broom Making Workshop?
- What does the workshop cost?
- Where do I meet for the workshop?
- Is the workshop at the Essex Street retail store?
- Is this a small group class?
- What’s included in the class?
- Are children allowed?
- Can I cancel for a full refund?
Key Highlights You’ll Actually Notice
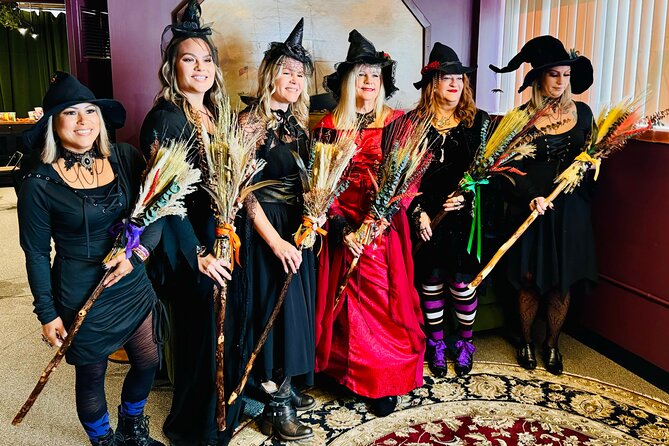
- Choose your broom handle and broomcorn to set the look from the start
- Personal attention in a max-12 class so you’re not fighting for help
- Customize with ribbons, charms, and accessories (color is totally optional)
- Learn the wrapping and attachment steps for a finished, sturdy souvenir
- Your broom gets wrapped for carrying home, so it’s easy to transport
Where to Meet in Salem (and How Not to Go to Essex Street)
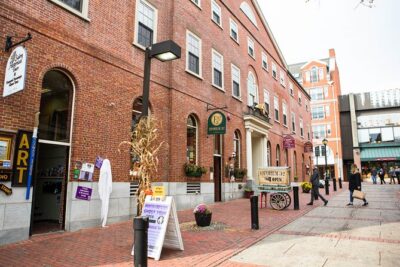
You’ll start at 32 Derby Square, Salem, MA 01970. That’s the key first checkpoint. The workshop also makes an important point: the activity is not at the Essex Street retail store location. So if you’re doing Salem navigation in your head based on the Essex Street storefront, pause and follow the meeting instructions instead.
This area is convenient for typical visitors. It’s near public transportation, and there’s reported plenty of nearby parking. That’s useful if you’re coming by car and don’t want a parking scavenger hunt right before crafts start.
Tip: arrive a few minutes early with your group settled. The shop has a limited seating area for people waiting, so you’ll want everyone ready to start.
What the Workshop Feels Like in Real Time (90 Minutes Means Plan Ahead)

The workshop runs about 1 hour 30 minutes (approx.), and it’s designed to be a relaxed, hands-on class, not a factory line. In practice, time can move depending on how you build your design and how much help you want while wrapping and attaching details.
I like that the pacing is described as not rushed. You should feel comfortable taking a beat to choose accessories and get guidance while you work. Still, if you have a tight dinner plan or a ticket right after, build a buffer. A couple participants noted the experience taking longer than the estimate once brooms were fully wrapped and finished.
A practical mindset helps here: treat it like a creative workshop first, and a quick stop second.
The 1692 story has more chapters than one walk covers


Step One: Picking Your Broom Handle and Broomcorn
The included materials start right at the beginning. You get to choose your broom handle and choose your broomcorn, which sets the tone for the whole broom.
Why this matters: when the base is yours, every later decoration looks intentional. If you pick a handle style you love and broomcorn that matches the mood you want, your final broom usually looks more “designed” and less “assembled.”
You’ll also see how instructors frame the process: you’re crafting a Salem souvenir that can be displayed on a shelf, hung decoratively, or even set up on a small altar-style corner.
Step Two: Designing with Charms, Ribbons, and Earthy Accessories
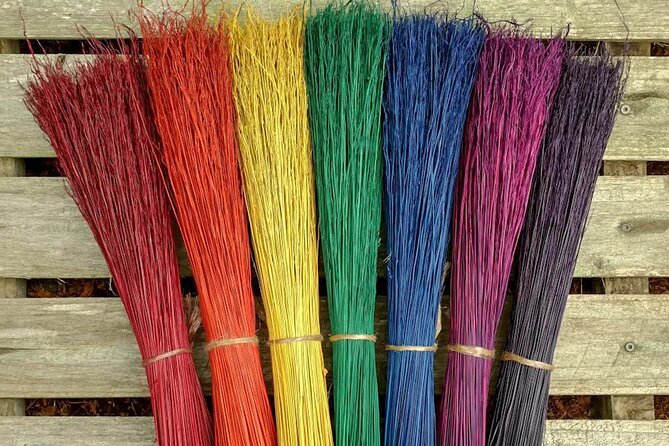
After the base is set, the fun becomes the details. You’ll select adornments and decide how much color to add. Options mentioned include colorful ribbons, trinkets and charms, and additional decorative elements, plus colorful broomcorn for visual variety.
This part is also where small-group help pays off. With only up to 12 travelers, instructors can notice if you’re fighting with a wrap or placing charms in a way that might loosen later.
A balanced note: there’s been one complaint about accessory variety and how the add-ons were organized. That doesn’t mean you won’t find enough to make a great broom, but it’s fair to assume that on busier days the choice of specific charm/ribbon styles could feel more limited. If you have a very specific look in mind, go in ready to adapt your design once you see what’s available.
Step Three: Wrapping the Broom and Adding the Finishing Details
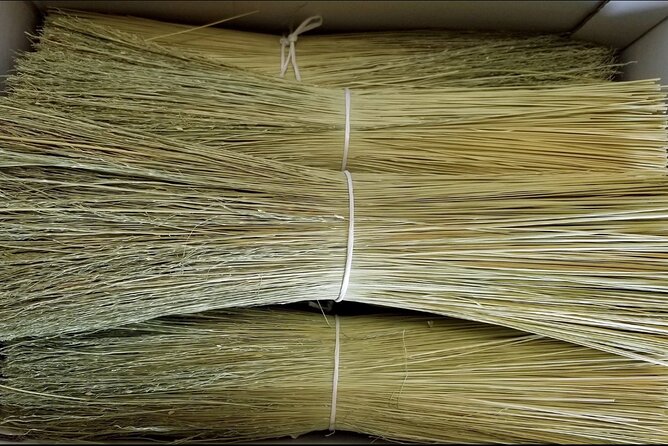
The core “how” of the workshop is wrapping and attaching. You’ll be taught steps to masterfully wrap your broom and attach charms and earthy elements.
The instructors position this as a playful Salem-themed craft—things like protection, warding off evil, and calling in good luck. Even if you’re not into the spiritual side, it’s still a handy structure for decorating: it nudges you to place items deliberately instead of randomly tacking on whatever sparkles most.
I like that the goal isn’t just decoration. You’re learning a method. That helps your broom look tidy, and it helps you walk away with something that can survive being carried home and put on display.
You may be guided by instructors such as Shelly, Ashley, Hilary, Beth, Justin, Stacy, Diane, Amy, Emily, and Mykaela, based on names that have come up in the class feedback. In other words: you’re likely not working with a single “robotic” facilitator. Expect real back-and-forth help while you build.
Carrying It Home: Wrapped, Ready to Display
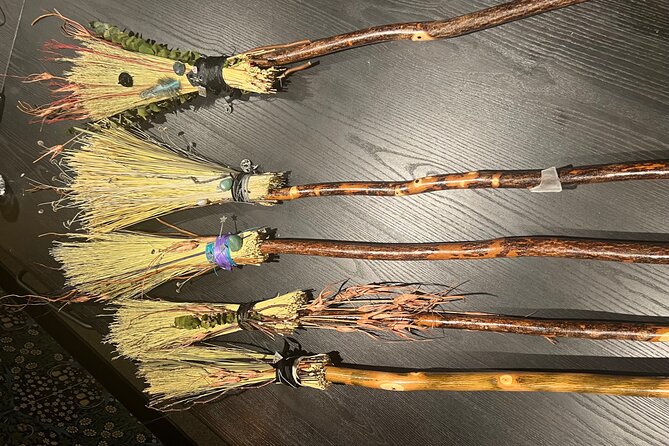
The finished broom isn’t just handed over. Many participants note that brooms are wrapped for easier carrying, which is a big deal in Salem when you’re also juggling shops, photos, and other stops.
You’ll want to plan what you’ll do when you get outside:
- If you’re walking, the wrap helps you carry without worrying about loose pieces.
- If you’re driving, you’ll still want to place it somewhere safe so charms and ribbons don’t get bumped.
One more practical issue: there doesn’t appear to be an included shipping option. If you’re thinking about shipping a broom home, plan for extra work and cost—some people report needing to use UPS for packaging and shipping, and it can get expensive.
Also, there’s a limited seating area for one or two guests. If you’re bringing others who aren’t doing the workshop, be ready to coordinate. Parents are asked not to leave children in the waiting area unattended, which is meant to preserve a calm crafting environment.
Half an hour north, Salem keeps going. More trips
- Salem’s Best Ghost Tour★ 4.5 · 4,186 reviews
- Bewitched Walking Tour of Salem★ 5.0 · 1,895 reviews
- Mysteries and Murders of Salem Guided Night-Time Walking Tour★ 5.0 · 1,488 reviews
- The Salem Witch Walk★ 4.5 · 1,301 reviews
- 2.5-Hour Salem History & Sightseeing Guided Walking Tour★ 5.0 · 850 reviews
Price and Value: Is $134.70 for a Broom Workshop Fair?
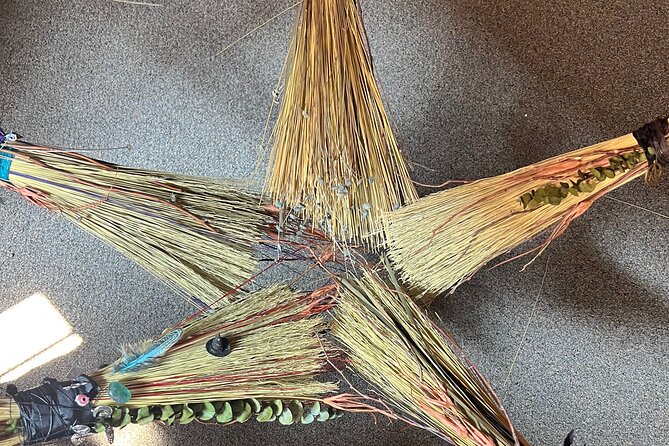
At $134.70 per person, this isn’t a cheap “drop-in activity.” But the value story is pretty clear.
You’re paying for:
- A complete souvenir build, not just a lesson
- Included materials like a handle, broomcorn, and adornments
- Instructor time for the wrapping and attaching method
- A small-group setting that makes help actually available
- A finished broom that’s meant for display (and is wrapped for carrying)
If you’ve looked at Salem souvenirs before, you know the charm-and-ribbon aisle can add up fast. Here, the price bundles the supplies and instruction into one experience—so you’re not hunting down components piece by piece.
Gratuity is not included, so plan for that if you feel the service was strong.
Who This Workshop Fits Best (and Who Might Want Another Plan)

This is a great fit if you:
- Want a hands-on Salem souvenir instead of another postcard
- Enjoy crafts where you can make choices—color, charms, and style matter
- Travel with a small group and want a shared activity that still feels personal
- Need a break from walking crowds and prefer a calm “make something” moment
It also works well for solo travelers. The size keeps things friendly, and the instructors can help you avoid getting stuck.
Families can work too, but the shop setup is a factor. Because children can’t be left unattended in the waiting area, it’s best when kids are actually participating, or when adults coordinating the group are ready to stay nearby.
Should You Book This Salem Broom-Making Workshop?
If you want a Salem experience that produces a meaningful take-home object, I think this workshop is an easy yes. The big strengths are the creative customization (you choose the handle, broomcorn, and decorations), and the small-group attention that helps you finish with confidence instead of frustration.
Book it if you have room in your schedule. Plan for it to take a little longer than the listed estimate, and double-check that you’re meeting at 32 Derby Square, not the Essex Street store.
If you’re short on time or only interested in a quick photo stop, you might prefer something lighter. But for anyone who likes craft projects, Salem themes, and the satisfaction of making something you can actually display at home, this is a strong choice.
FAQ
How long is the Witch City Broom Making Workshop?
It’s listed at approximately 1 hour 30 minutes, though you should plan a bit of extra time in case your broom needs full finishing and wrapping.
What does the workshop cost?
The price is $134.70 per person.
Where do I meet for the workshop?
The meeting point is 32 Derby Square, Salem, MA 01970, USA. The activity ends back at the meeting point.
Is the workshop at the Essex Street retail store?
No. The workshop location is not at the Essex Street retail store location.
Is this a small group class?
Yes. The workshop has a maximum of 12 travelers, which supports more personal attention.
What’s included in the class?
You’ll choose your broom handle and broomcorn, select adornments (and optionally add color), and craft your own unique souvenir broom.
Are children allowed?
There is a limited seating area for waiting (for one or two guests). Parents are told that children are not allowed in the waiting area unattended.
Can I cancel for a full refund?
Yes. You can cancel up to 24 hours in advance for a full refund.
More of the Boston Ledger




The Witch City Docket
Salem, 1692 and After




New on the Boston Docket
- Private Walking Salem Legends Tour Professional Guide
★ 5.0 · 3 reviews - Pirates and Privateers Walking Tour with Real Pirates Admission
★ 4.5 · 3 reviews - Discover Salem’s History & Practice Authentic Witchcraft
★ 4.1 · 4 reviews - The Ghost Walk. Tortured Souls of Salem
★ 5.0 · 4 reviews - Cemetery and Witchcraft Trials Tour
★ 5.0 · 4 reviews
Salem Day Trips & Tours, compared.
 ★ 5.0History and Hauntings of Salem Guided Walking TourFrom $3614,564 reviews
 ★ 4.5Salem’s Best Ghost TourFrom $304,186 reviews
 ★ 5.0Salem Voodoo, Vampires, and Ghosts Guided Walking Tour1,931 reviews
 ★ 5.0Bewitched Walking Tour of SalemFrom $351,895 reviews
 ★ 5.0Satanic Salem Walking TourFrom $301,635 reviews
 ★ 5.0Mysteries and Murders of Salem Guided Night-Time Walking TourFrom $361,488 reviews
 ★ 4.5The Salem Witch WalkFrom $251,301 reviews
 ★ 5.0Wicked Awesome Tours: Witch Trial History and Salem Haunts!From $291,032 reviews
Browse the lists this tour appears in